Command Line Tool
Table of contents
Overview
zstack-cli is the command line tool for users to execute all ZStack APIs. All API examples in this user manual are demonstrated using zstack-cli.
As ZStack is built on SOA(Service Oriented Architecture), all ZStack APIs are essentially messages; for example, you will see a CLI command called StartVmInstance in VM related chapter, which is actually mapping to the API message: APIStartVmInstanceMsg; nevertheless, people are more familiar with HTTP calls than messages, so ZStack ships a builtin HTTP server that wraps all API messages into HTTP post requests. zstack-cli is built on calling APIs through the builtin HTTP server.
Usage
Connect to ZStack management node
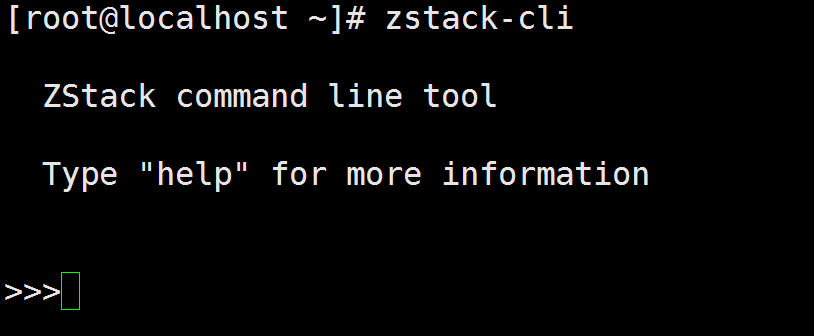
zstack-cli is installed by default after you install a ZStack management node. You can launch it by simply typing ‘zstack-cli’ in a shell console:
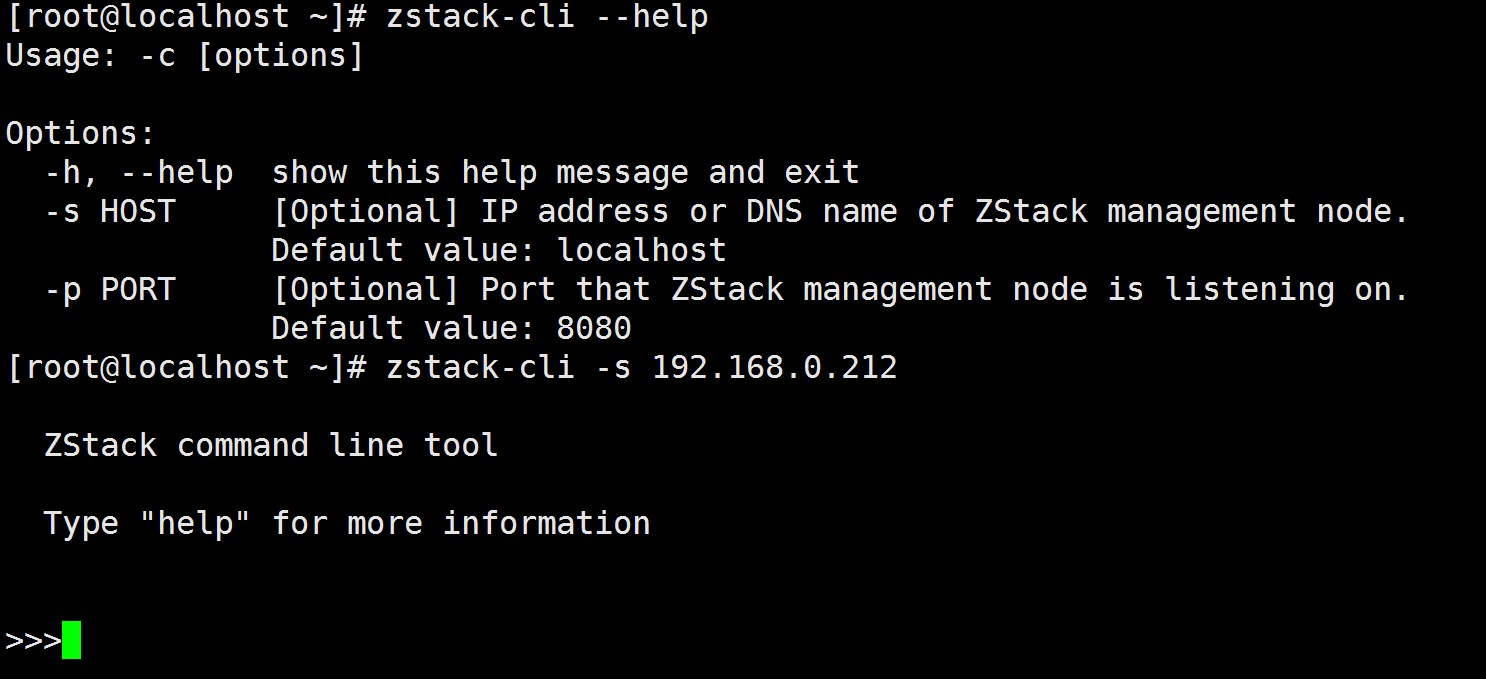
if no parameters are provided, zstack-cli will connect to 8080 port on localhost; to connect a remote ZStack management node, you can use options ‘-s’ and ‘-p’ to specify IP and port:
Note
ZStack management nodes are running in Java servlet containers, for example, Tomcat, whose port numbers are rarely changed; most of the time you only need to specify the IP by ‘-s’.
if you have a multi-node deployment, you can connect the zstack-cli to any management nodes.
Modes
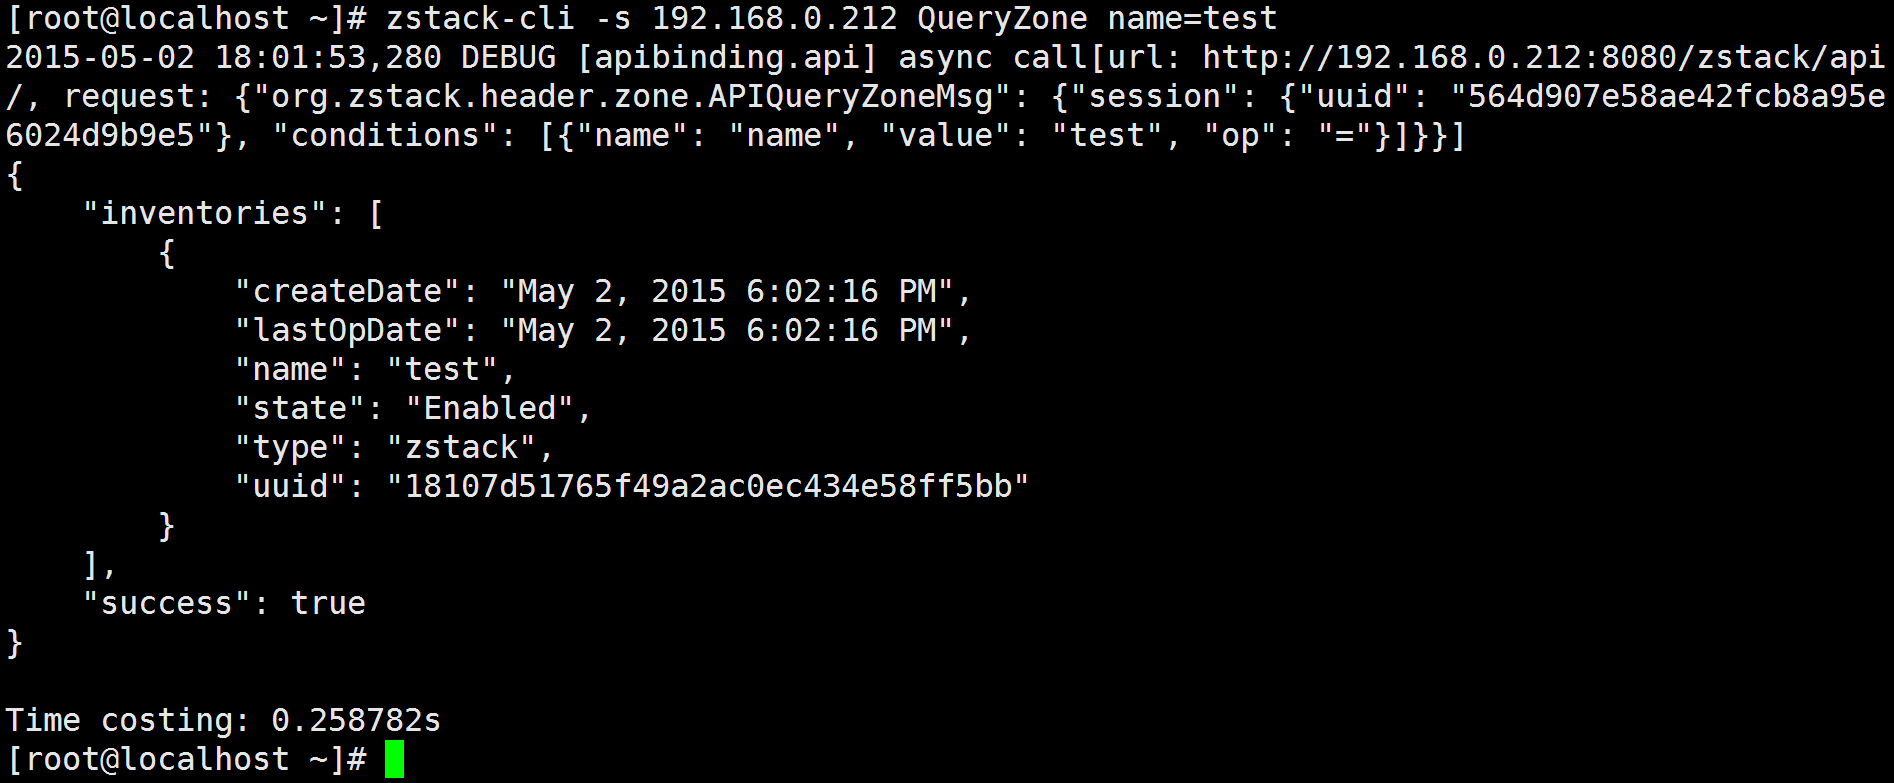
zstack-cli can work in a command mode that receives parameters from shell, runs once, and prints results to the shell console, for example:
or an interactive shell mode that keeps a session for continuously executing, for example:
people usually prefer interactive mode for manual execution but command mode for script integration.
LogIn
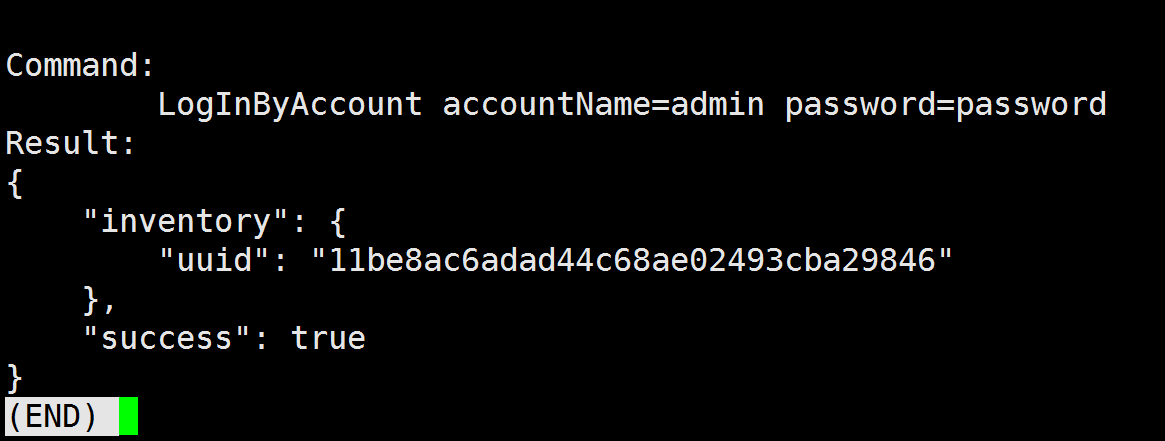
In this ZStack version(0.6), the IAM(Identity and Access Management) system is not ready; only one account ‘admin’ with default password(‘password’) is available. Before executing any commands, you need to run the login command ‘LogInByAccount’ to get a session token which is automatically saved by zstack-cli to ~/.zstack/cli/session and you don’t need to keep it separately:
>>> LogInByAccount accountName=admin password=password
LogOut
Once you finish your work, you can use ‘LogOut’ to invalidate current session:
>>> LogOut
the LogOut command receives a parameter ‘sessionUuid’, but you don’t need to provide it as zstack-cli will retrieve it from where it’s kept.
Execute API Commands
Every API is a command with several parameters, you can execute them in either command mode or interactive mode:
>>> StartVmInstance uuid=11be8ac6adad44c68ae02493cba29846
[root@localhost ~]# zstack-cli StartVmInstance uuid=11be8ac6adad44c68ae02493cba29846
Note
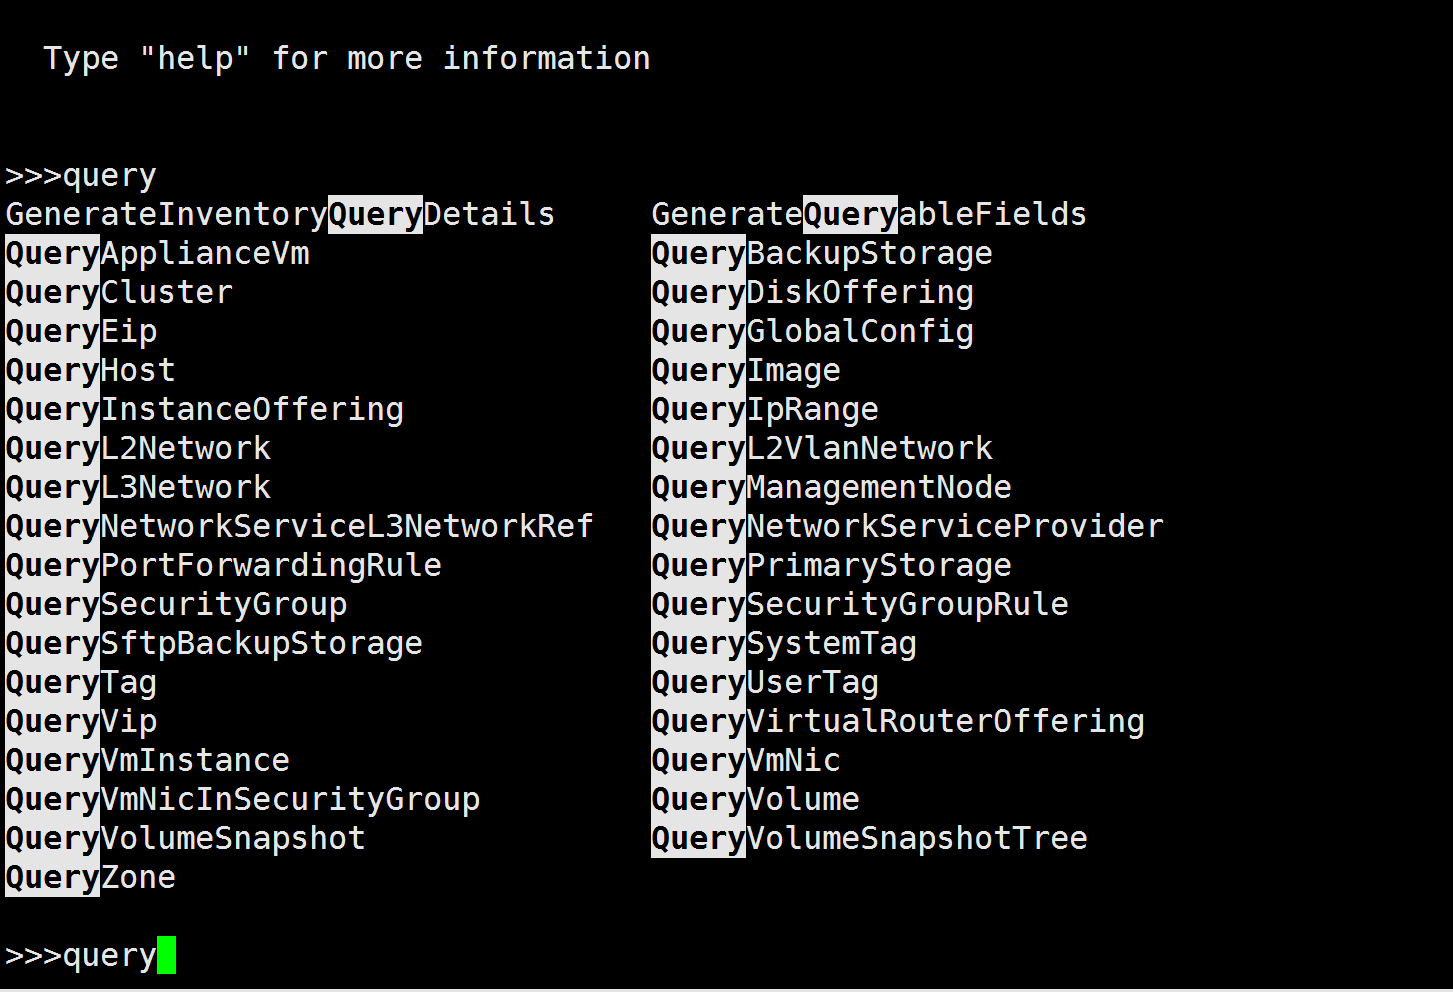
In interactive mode, you can use Tab key to auto-complete a command or remind you about candidate parameters.
View Command History
You can use ‘more’ command to view your command history, for example:
>>> more
or:
[root@localhost ~]# zstack-cli more
the result format is the same to Linux more command, you can scroll up/down and search.
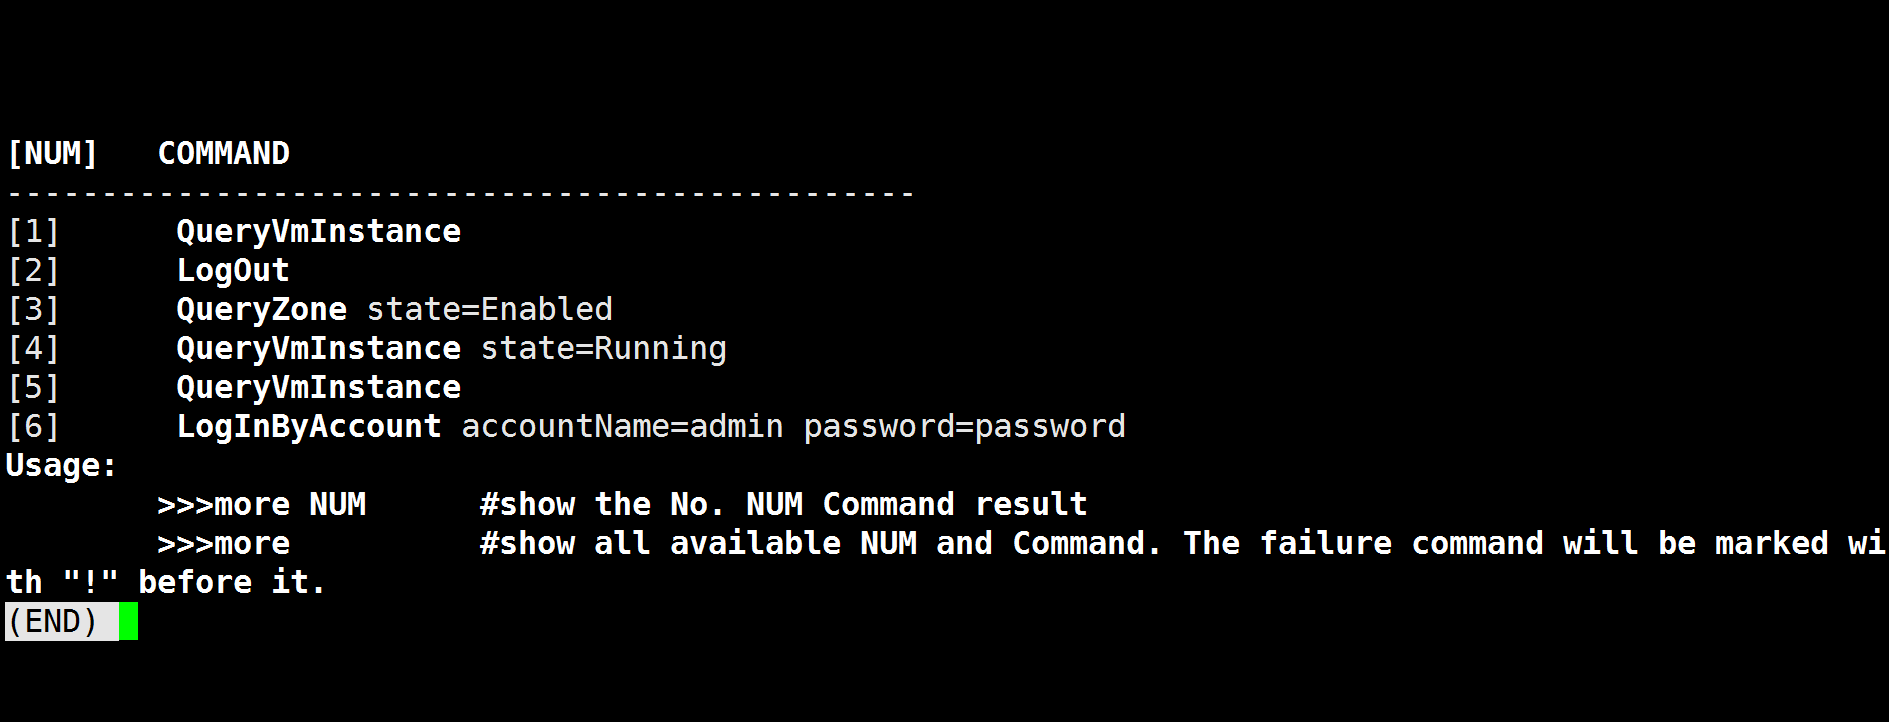
to view the details of a command, use ‘more’ command following a command number:
>>> more 6
or:
[root@localhost ~]# zstack-cli more 6
the result is like:
Note
Viewing command details is very useful when output of a command is larger than the screen size; for example, the result of QueryVmInstance.
Export Command History
You can export command history by ‘save’ command, saving one history each time or multiple histories at once:
>>> save 1
Saved command: 1 result to file: /home/root/QueryZone-1.json
[root@localhost ~]# zstack-cli -s 192.168.0.212 save 1
Saved command: 1 result to file: /home/root/QueryZone-1.json
or:
>>>save 1,2,3
Saved command: 1 result to file: /home/root/QueryZone-1.json
Saved command: 2 result to file: /home/root/CreateZone-2.json
Saved command: 3 result to file: /home/root/LogInByAccount-3.json
[root@localhost ~]# zstack-cli -s 192.168.0.212 save 1,2,3
Saved command: 1 result to file: /home/root/QueryZone-1.json
Saved command: 2 result to file: /home/root/CreateZone-2.json
Saved command: 3 result to file: /home/root/LogInByAccount-3.json
by default results are saved to current working folder, you can specify a destination folder by supplying an extra parameter of folder path:
>>> save 1 /tmp
save history command 1 result to /tmp/COMMAND-1.json